| 赞 | 2 |
| VIP | |
| 好人卡 | |
| 积分 | 1 |
| 经验 | |
| 最后登录 | 2020-7-27 |
| 在线时间 | 1379 小时 |
- 梦石
- 0
- 星屑
- 76
- 在线时间
- 1379 小时
- 注册时间
- 2012-7-5
- 回帖
- 1643

|
 发表于 2014-7-14 10:53:32
|
显示全部楼层
发表于 2014-7-14 10:53:32
|
显示全部楼层
嘿LZ
脚本窝也不会写, 但是已经写了个【仅适用本皮肤】的bitmap生成代码, 处理一下就可以应用到窗口上了【不过累得不想写了
其中用到的所有数值都【仅适用本皮肤】
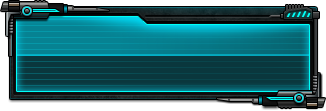
注意: 给出的长宽太小会Error
先上图:
320x240
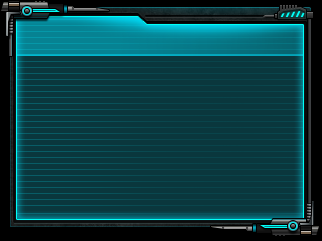
256x128
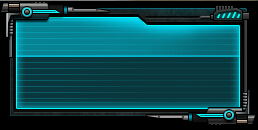
先把LZ的图片命名msgbg.png放到Graphics/System里面.
代码在此
[pre lang="ruby" line="1"]#encoding:utf-8
class Bitmap
# 应用模版
# rects 顺序必须如下
def apply_mask(bitmap, *rects)
r4 = Rect.new(rects[4].x, rects[4].y, self.width-rects[0].width-rects[1].width, rects[4].height) # 顶部横条rect
r5 = Rect.new(self.width-rects[5].width, rects[1].height, rects[5].width, self.height-rects[1].height-rects[3].height) # 右部纵条rect
r6 = Rect.new(rects[6].x, self.height-rects[6].height, self.width-rects[2].width-rects[3].width, rects[6].height) # 底部横条rect
r7 = Rect.new(rects[7].x, rects[7].y, rects[7].width, self.height-rects[0].height-rects[2].height) # 左部纵条rect
r8 = Rect.new(rects[7].width, rects[4].height, self.width-rects[5].width-rects[7].width, self.height-rects[4].height-rects[6].height) # 中间背景rect
# blt(x, y, src_bitmap, src_rect[, opacity])
self.blt(0, 0, bitmap, rects[0])
self.blt(self.width - rects[1].width, 0, bitmap, rects[1])
self.blt(0, self.height - rects[2].height, bitmap, rects[2])
self.blt(self.width - rects[3].width, self.height - rects[3].height, bitmap, rects[3])
# tile(r4, bitmap, rects[4]) 因为r4颜色是渐变的所以换方法
# stretch_blt(dest_rect, src_bitmap, src_rect[, opacity])
self.stretch_blt(r4, bitmap, rects[4])
tile(r5, bitmap, rects[5])
tile(r6, bitmap, rects[6])
tile(r7, bitmap, rects[7])
tile(r8, bitmap, rects[8], 1)
end
# 在 rect 内用 src_bitmap 平铺
# align : 0 默认平铺方式, 1 纵向平铺横向拉伸, 2 横向平铺纵向拉伸
def tile(rect, src_bitmap, src_rect, align = 0)
bitmap = Bitmap.new(src_rect.width, src_rect.height)
bitmap.blt(0, 0, src_bitmap, src_rect)
b = Bitmap.new(rect.width, rect.height)
ws = (rect.width / bitmap.width) +1
hs = (rect.height / bitmap.height) +1
case align
when 0
ws.times do |x|
hs.times do |y|
b.blt(x*src_rect.width, y*src_rect.height, bitmap, bitmap.rect)
end
end
when 1
hs.times do |y|
b.blt(0, y*src_rect.height, bitmap, bitmap.rect)
end
b.stretch_blt(b.rect, b, Rect.new(0, 0, src_rect.width, b.height))
when 2
ws.times do |x|
b.blt(x*src_rect.width, 0, bitmap, bitmap.rect)
end
b.stretch_blt(b.rect, b, Rect.new(0, 0, b.width, src_rect.height))
end
self.blt(rect.x, rect.y, b, b.rect)
end
end
b0 = Cache.system("msgbg.png")
b1 = Bitmap.new(256, 128)
r0 = Rect.new(0, 0, 147, 57) # 左上角
r1 = Rect.new(268, 0, 58, 56) # 右上角
r2 = Rect.new(0, 83, 26, 29) # 左下角
r3 = Rect.new(215, 72, 111, 40) # 右下角
r4 = Rect.new(147, 0, 120, 56) # 顶部横条
r5 = Rect.new(300, 56, 26, 12) # 右部纵条
r6 = Rect.new(26, 83, 190, 29) # 底部横条
r7 = Rect.new(0, 57, 26, 24) # 左部纵条
r8 = Rect.new(25, 56, 275, 24) # 中间背景
b1.apply_mask(b0, r0, r1, r2, r3, r4, r5, r6, r7, r8)
# 修补, 右下角
b1.blt(b1.width-26, b1.height-42, b1, Rect.new(b1.width-26, b1.height-54, 10, 12))
s = Sprite.new
s.bitmap = b1
rgss_stop[/pre] |
评分
-
查看全部评分
|



 写轮眼
写轮眼
 发表于 2014-7-13 20:02:25


 提升卡
提升卡 沉默号角
沉默号角 喧嚣号角
喧嚣号角 变色卡
变色卡 升龙剑
升龙剑


 -azogi: